How do you fix the ethernet port in wall not working? Have you ever been in a situation where you urgently required a dependable, high-speed internet connection, only to stumble upon an unused Ethernet port on your wall?
I know I have, and it can be incredibly frustrating not knowing how to tap into this potential resource.
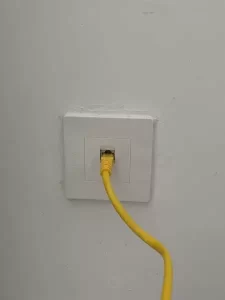
To activate the wall’s Ethernet port, you need to meet two requirements. First, you must have an Ethernet port, and second, the port’s status must be completely fine.
Fortunately, in this guide, I will walk you through the steps to activate that Ethernet port on your wall, turning it into a gateway for a stable and speedy internet connection.
How to Add Ethernet Ports to Your House?
You’ve moved into a new house or realized your current home setup isn’t quite meeting your connectivity needs. Maybe you’ve found yourself thinking, “There are no Ethernet ports in the house. How do I fix this?” Ethernet ports can offer faster and more reliable internet connectivity than Wi-Fi, especially in areas where the Wi-Fi signal is weak or unstable. Let’s explore how you can add Ethernet ports to your house.
Evaluate Your Needs
Before plunging into any project, evaluate where you need the Ethernet ports the most. Consider rooms where you have smart TVs, gaming consoles, or desktop computers that could benefit from a wired connection.
Required Materials
- Ethernet cables
- Ethernet wall plates
- A network switch or router with available ports
- Drill and drill bits
- Screwdrivers
- Cable clips or mounts
Steps to Add Ethernet Ports
1. Planning the Layout
Map out where you want the Ethernet ports to go. This will give you an idea of how much Ethernet cable you’ll need and where you’ll need to drill holes for the wall Ethernet ports.
2. Running the Cables
Run Ethernet cables from your main router or a network switch to the designated areas. This is typically done through the walls or along the baseboards using cable clips. Plugging an Ethernet cable into the wall can offer a neat and organized appearance.
3. Install the Wall Plates
At each designated area, cut a hole in the wall to fit an Ethernet wall plate. Make sure to attach the Ethernet cables securely to the wall plates.
4. Connect to Router or Switch
Once the cables are in place and the wall plates are installed, connect the other end of each Ethernet cable to an open port on your router or network switch.
Troubleshooting
If you find that you have no Ethernet ports in the house post-installation, double-check all connections and ensure that the cables are correctly inserted into both the wall plates and the router or network switch.
What Are the Wall Ethernet Ports Connected To?
To answer this question, we first need to determine the destination of your Ethernet port. In other words, when you insert your cable into the socket, where does it lead? What is the socket linked to?
First things first, you gotta think about the chance that it might not be hooked up to anything, ya know? Perhaps the contractor or previous owner envisioned a location for an Ethernet cable connection before any wiring was actually installed. However, it’s improbable that someone would leave this process unfinished.
To be certain, remove the wall plate and inspect the interior. Depending on your location and specific circumstances, you may encounter various scenarios:
- If you reside in a house with Ethernet ports in multiple rooms, you’ll likely find the patch panel to which they all connect. This patch panel is typically located in your basement, attic, or a closet in your hallway.
- If you live in an apartment, the situation may be more complicated. You might have a patch panel within your apartment, but there could also be a communal patch panel that is shared by the whole apartment complex or building. Accessing this panel might not be possible.
It’s essential to grasp what your Ethernet port is linked to in order to pinpoint whether the problem originates from the wall port or another element within the network infrastructure.
How to Test Ethernet Port in Wall?
To test an Ethernet port in the wall, you’ll need some specialized equipment and a basic understanding of networking. Here’s a step-by-step guide:
Tools You’ll Need
- Ethernet Cable
- Laptop/Computer with an Ethernet port
- Network Cable Tester (Optional)
- Ethernet Wall Plate (Optional)
Steps
Basic Testing
- Plug the Ethernet Cable: Take an Ethernet cable that you know is working (you can test it by connecting your computer to your router) and plug one end into the wall port.
- Connect to Laptop/Computer: Plug the other end of the Ethernet cable into the Ethernet port on your computer or laptop.
- Check Network Connection: On your computer, go to the network settings to see if the computer recognizes the connection. If it does, you will see an “Ethernet Connected” status.
Advanced Testing Using Network Cable Tester
- Disconnect Cable: Remove the Ethernet cable from your computer but leave it plugged into the wall.
- Connect Tester: Attach the Ethernet cable to a network cable tester.
- Run the Test: Turn on the tester and check for any faults in the wiring. If the tester shows that all the individual wires within the cable have connectivity, then the wall port is good.
Testing Wall Plate (If Applicable)
- Disconnect Cable: Remove the Ethernet cable from the wall port.
- Check Wiring: Unscrew and remove the wall plate to examine the wiring. Make sure all the wires are securely connected.
- Use a Multimeter: For a more in-depth test, you can use a multimeter to test the continuity of each individual wire.
Results
If the computer recognizes the Ethernet connection, and/or the cable tester shows no faults, then the wall port is likely working correctly. If there are issues, you may need to rewire the wall port or consult with a professional for further diagnosis.
Remember, the steps above are for basic diagnostic purposes and may not cover all types of issues that could occur with a wall Ethernet port. Always take necessary safety precautions and consult with a professional when in doubt.
You may also like: How Can I Test Ethernet Cables If I Don’t Have A Tester?
Why Is My Ethernet Port in Wall Not Working? And How Can I Fix It?
Let’s explore some possible reasons for a non-functional wall Ethernet port and the steps to address them. Just remember, this can get pretty tricky, and your Internet Service Provider (ISP) might be the go-to folks for sorting it out because they’re the ones in charge of all the tech stuff.
Basic Troubleshooting
Before delving deeper, perform some basic troubleshooting steps. Inspect your wall jack carefully; sometimes, paint can interfere with the conductors, requiring you to replace the RJ45 jack. Furthermore, inspect the internal wires within the jack for any loose connections, as such issues can result in connectivity problems. If in doubt, consider replacing the jack to ensure it functions correctly.
Repeatedly plugging and unplugging cables can cause mechanical issues, potentially damaging the jack. If necessary, acquire a new jack, reconnect everything, and test for functionality.
Problems with the Patch Panel
If basic troubleshooting doesn’t resolve the issue, it could be related to your patch panel. Locate the patch panel in your residence and inspect it. Ensure that each wire is correctly connected to its designated location. If the wires are not labeled, use a cable tester or a similar device to confirm the connections between the patch panel and the wall port.
These devices typically consist of two tools—one placed at the patch panel and the other at the wall port. If there’s a proper connection, the device will provide a signal. Use it to verify that all wires are correctly linked.
Problems with the Cable
There may be issues with your Ethernet cable hidden within your walls. To diagnose this, you’ll need a Time-Domain Reflectometer (TDR). TDRs are used to identify breaks and faults in various cables, including Ethernet cables (typically twisted pairs).
A TDR will pinpoint the location and pair affected by the break. While high-end patch panels may incorporate this feature, you might need to acquire a TDR or consider re-pulling the cable to identify and rectify the problem.
Problems with the Wiring
Though less likely, the Ethernet wall socket itself might be wired incorrectly. This situation is uncommon because professional technicians, usually from your ISP, handle the installation. However, if the socket was set up by a previous owner, landlord, or someone with insufficient knowledge, you might resolve the issue by adjusting the wiring.
Ethernet wall sockets involve eight wires—four for transmitting and four for receiving data. When the socket is installed, these wires are arranged to connect to specific pins. There are two wiring standards, T568A and T568B, and it’s crucial that both ends of a cable use the same standard. Check the wiring on both your patch panel and wall socket to ensure the wires are connected to the correct pins and that the same standard is used on both ends. If you spot any differences in these setups, they might just be causing the issue.
In Conclusion
That covers the process of activating a wall Ethernet port. It’s a straightforward and highly convenient method when followed as instructed. If you found this guide useful for getting your port up and running, or if you’ve got more questions, feel free to hit me up anytime!