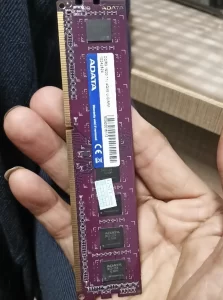
RAM (Random Access Memory) is a critical component in computers, serving as the cornerstone for system performance. It acts as a short-term memory where the operating system, applications, and data in current use are kept so they can be quickly reached by the device’s processor. Upgrading RAM is a common practice for enhancing a computer’s efficiency, particularly as software demands and multitasking needs grow.
However, despite its apparent simplicity, installing new RAM sometimes leads to unexpected issues, such as the computer failing to start. This problem can stem from various factors, ranging from compatibility issues to incorrect installation. In this article, we will delve into the reasons why a computer might not start after a RAM upgrade and provide practical solutions to troubleshoot this issue. So, keep reading to uncover the key to resolving and preventing these startup challenges following a RAM upgrade.
Basics of RAM Upgrade

Types and Specifications of RAM
Understanding the types and specifications of RAM is crucial for a successful upgrade. Here’s a brief overview:
- DDR, DDR2, DDR3, DDR4, DDR5: These are different generations of RAM, with DDR5 being the latest and fastest. Each type has a unique pin configuration and operates at different speeds and voltages.
- Capacity: RAM capacity, measured in gigabytes (GB), directly impacts how much data can be stored for quick access. Common sizes range from 4GB to 32GB per stick.
- Speed: Measured in MHz, the speed of RAM affects how fast it can process data. Higher numbers indicate faster performance.
- Latency: This refers to the delay between a command and its execution by the RAM. Lower latency means faster response time.
Common Reasons and Benefits of Upgrading RAM
Upgrading RAM is a popular way to boost computer performance. Key reasons and benefits include:
- Enhanced Multitasking: More RAM allows a computer to handle more tasks simultaneously without slowing down.
- Improved Application Performance: Programs that require a lot of memory, like video editing software or games, run smoother with additional RAM.
- Faster Overall Speed: With more RAM, your computer can store more data for quick access, speeding up boot times and reducing load times.
- Cost-Effective Upgrade: Compared to other hardware upgrades, increasing RAM is relatively inexpensive and offers a significant performance boost.
Upgrading RAM is one of the simplest and most effective ways to enhance a computer’s performance, benefiting both casual users and power users alike.
Common Issues Post RAM Installation
Potential Problems After Installing New Memory
Installing new RAM can sometimes lead to unexpected issues. Key problems include:
- Compatibility Issues: RAM must be compatible with the motherboard in terms of type, speed, and size. Incompatible RAM can prevent the system from booting.
You may also like: Can I Use DDR5 RAM on DDR4 Motherboard? - Incorrect Installation: If RAM is not properly seated in the slot, or if the wrong slots are used for dual-channel configurations, the computer might fail to start.
- Faulty RAM Modules: Occasionally, new RAM sticks can be defective, leading to system instability or failure to boot.
- BIOS/UEFI Settings: Sometimes, the system’s BIOS or UEFI needs to be updated or configured to recognize the new memory.
How These Issues Lead to Boot Failure
These problems can directly impact the computer’s ability to start:
- System Incompatibility: The motherboard may fail to recognize the new RAM due to incompatibility, halting the boot process.
- Physical Connection Errors: Improperly installed RAM doesn’t make the necessary electrical connections, preventing the system from accessing the memory.
- Hardware Malfunctions: Defective RAM can cause a range of boot issues, from continuous reboot cycles to complete failure to start.
- BIOS/UEFI Conflicts: Older BIOS/UEFI firmware might not support the newly installed memory’s specifications, leading to boot failures.
Technical and Hardware Factors Analysis
Impact of Technical and Hardware Factors on Compatibility
The compatibility of RAM with a computer system is influenced by various technical and hardware factors. Understanding these is key to a successful upgrade:
- RAM Speed and System Support:
- The speed of RAM (measured in MHz) needs to be compatible with what the motherboard can support.
- Using RAM that is faster than the motherboard can handle may result in the system defaulting to a lower speed or not booting at all.
- Motherboard Limitations:
- Each motherboard has a maximum amount of RAM it can support, as well as specific requirements for RAM density and configuration.
- Exceeding these limits or not meeting configuration requirements can lead to compatibility issues.
Analyzing Differences Across Configurations and Brands
The interplay between different RAM configurations and brands can also affect compatibility:
- Mixing RAM Brands:
- While mixing brands is technically possible, it can sometimes lead to instability due to variations in timing and voltage requirements.
- Dual Channel vs. Single Channel Configurations:
- Some systems are optimized for dual-channel memory, which requires two identical sticks of RAM to operate at full efficiency.
- Using mismatched RAM in these systems can lead to reduced performance or compatibility issues.
- You may also like: Do You Get Better Performance With 2 Or 4 RAM Sticks?
- Timing and Latency Differences:
- RAM sticks with different timing and latency specifications can conflict, causing the system to be unstable or fail to boot.
A thorough understanding of both the technical specifications of the RAM and the hardware limitations of the computer system is essential for ensuring compatibility and optimal performance. Careful consideration of these factors will help avoid common pitfalls associated with RAM upgrades.
Preventive Measures and Best Practices
Important Considerations Before Upgrading RAM
To ensure a smooth and successful RAM upgrade, certain preventive measures and best practices should be followed:
- Ensure Compatibility:
- Check the motherboard’s specifications for RAM type (DDR3, DDR4, etc.), maximum supported size, speed, and configuration.
- Ensure the new RAM matches these specifications to avoid compatibility issues.
- Backup Your Data:
- Always backup important data before upgrading hardware. While RAM upgrades typically don’t affect data, it’s wise to be prepared for any unexpected issues.
- Purchase from Reputable Brands:
- Buy RAM from well-known and reliable manufacturers to reduce the risk of receiving defective products.
Choosing the Right RAM and Safe Installation
Selecting the appropriate RAM and installing it correctly are crucial steps:
- Selecting the Right RAM:
- Consider the purpose of the upgrade (gaming, professional work, general use) and select RAM that meets these needs.
- For performance-oriented tasks, opt for higher-speed RAM with lower latency.
- Safe Installation Practices:
- Ground yourself to prevent static electricity from damaging the components.
- Handle the RAM modules by the edges and avoid touching the connectors.
- Align the notches on the RAM stick with the corresponding keys in the slot and press down firmly until the side clips click into place.
By taking these preventive measures and adhering to best practices, you can significantly reduce the risk of issues during and after a RAM upgrade. Proper preparation and careful installation are key to enhancing your computer’s performance through a RAM upgrade.
Frequently Asked Questions (FAQs)
After installing new RAM, why is there no display?
After installing new RAM, if there’s no display, it could be due to a number of reasons:
- Incorrect Installation: The new RAM might not be properly seated in the memory slot. Ensure you’ve firmly pushed the RAM sticks into place until the small clips on the side click into position.
- Incompatibility: The new RAM may not be compatible with your motherboard. Always check your motherboard’s manual or manufacturer’s website to ensure you’re using the correct type and speed of RAM.
- Faulty RAM: If the new RAM is faulty, it may cause display issues. Try installing the old RAM to see if the problem persists. If the display comes back, it could indicate that the new RAM is faulty.
Why won’t Windows boot even though BIOS recognizes the RAM?
If your BIOS recognizes the new RAM but Windows won’t boot, it could be due to the following reasons:
- Incompatible RAM: Even if the BIOS recognizes the new RAM, it might not be fully compatible with your system. Compatibility is not just about physical fitting, but also about the ability to work with your system’s chipset and processor.
- Incorrect Memory Settings: If the memory settings in your BIOS are incorrect, Windows may fail to boot. This could be the memory speed, voltage, or timings. Try resetting your BIOS settings to their default to see if this resolves the issue.
- Faulty RAM: The RAM could be faulty. If possible, try the new RAM in a different computer, or try known good RAM in your computer.
- Windows Configuration Issues: Windows might be configured to use a specific amount of RAM and is unable to adjust to the new size. A repair installation of Windows could solve this issue. But remember to back up your important files first.

